Make Your Own City Trip Maps with Google Maps in 5 Easy Steps
Whenever I plan a city trip, I always make a map of that city. Divided into practical tips, sights, museums, breakfast spots, coffee bars, restaurants, markets and much more. I always use Google My Maps for this. I am not sponsored by Google, but I haven't found a worthy alternative. If you know any interesting tools to create city trip maps (which also work on mobile phones), you can always let me know.
If you want to know how to make a Google My Map city trip map yourself, just follow these 5 easy steps:
Step 1: go to Google My Maps
The easiest way to get to Google My Maps is directly via the link mymaps.google.com. Make sure to be logged in with your Google account. If you don't have a Google account, you need to click on "create account" to get started.
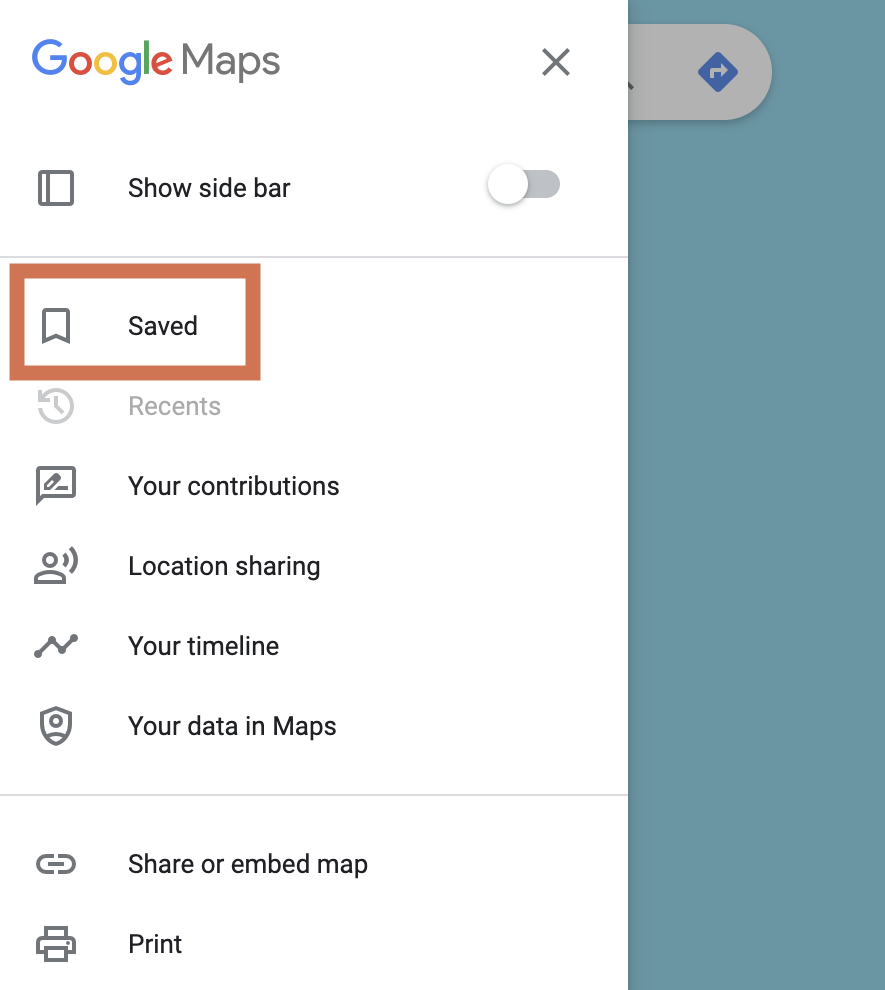
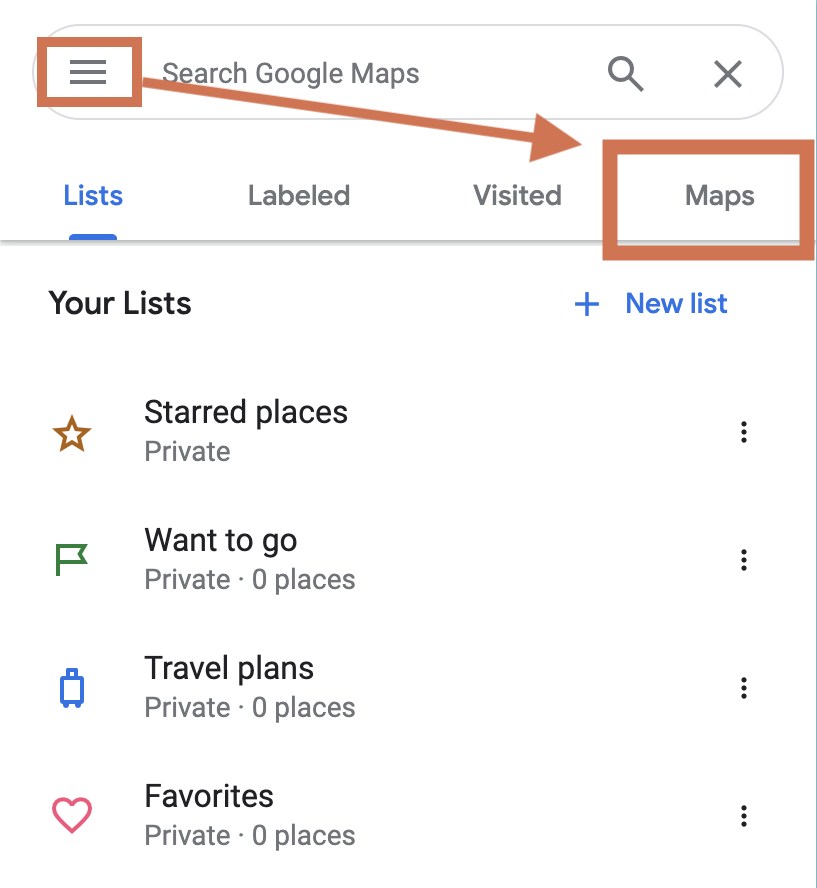
Another way to go to Google My Maps is via the desktop version of Google Maps. Once opened, you have to click on the hamburger menu at the top left and then click on "Saved". You will then see 4 tabs: Lists, Tagged, Visited and Maps. If you click on the last tab, you will see the "Create Map" option.
Step 2: Create a new map
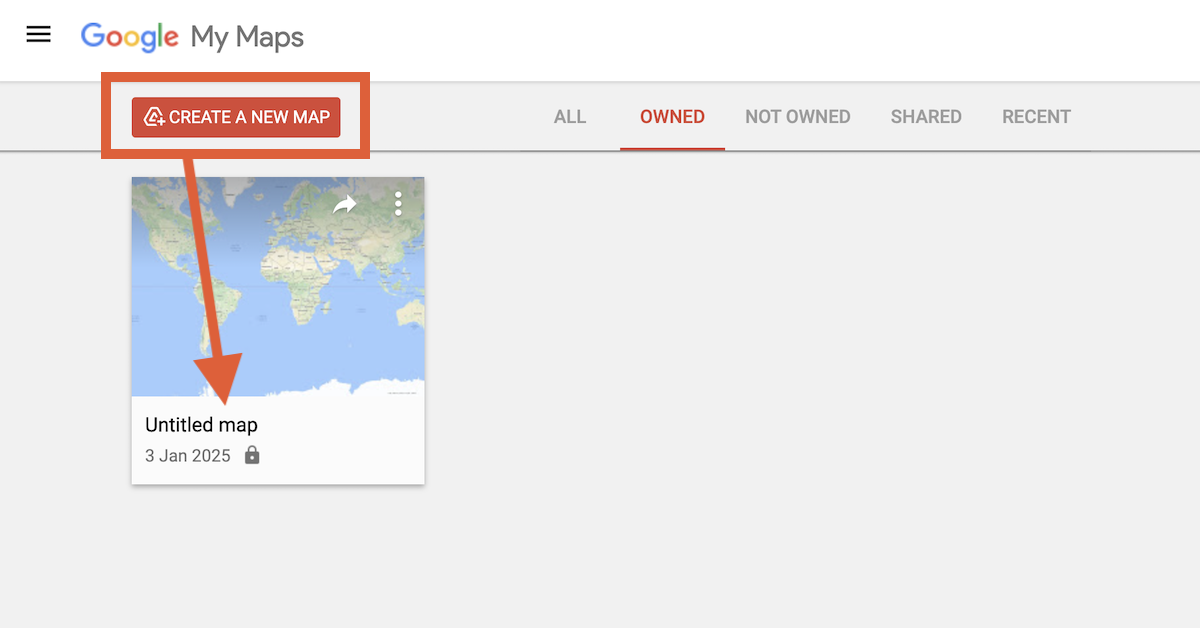
Click on "Create map" or "Create a new map". This will automatically create a map in the 'Owned' tab, called "Untitled map". And as long as you don't share this map, only you can see it.
If someone adds your Google account to a map that they created, it will appear in the 'Shared' tab.
Step 3: Add layers to your map and name them
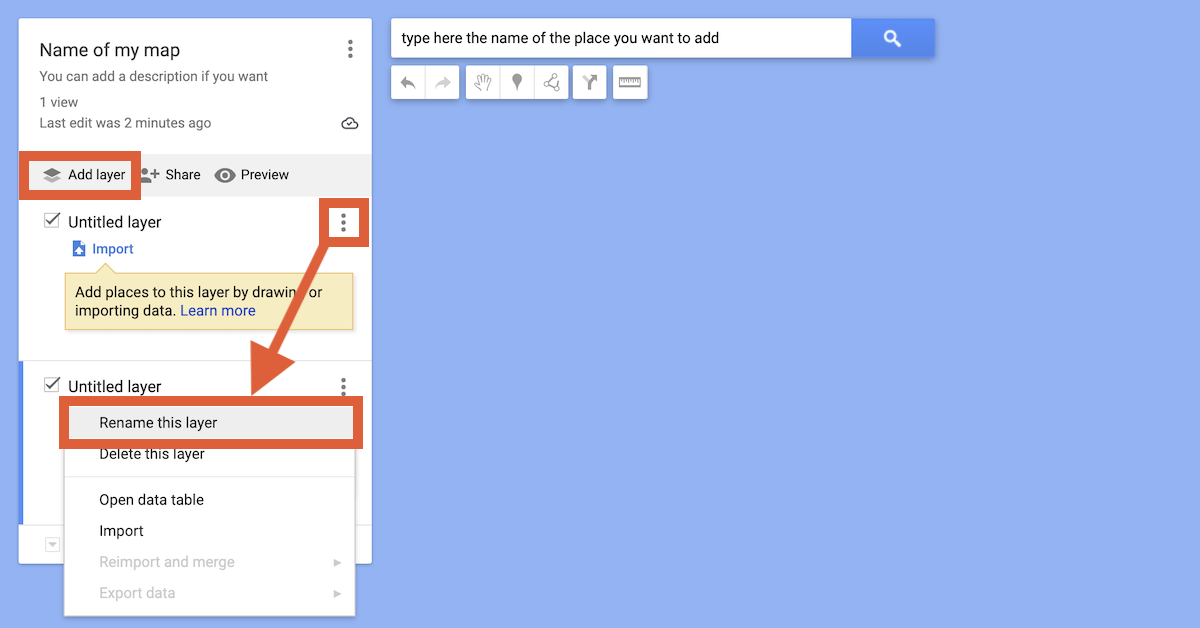
Now you can start arranging your map. Go to your first layer (Untitled layer) and click on the 3 dots next to it. This will give you several options, including the option to change the name of the layer. Once you have arranged your map in different layers, you can start adding places to the different layers. You can of course also add layers (maximum 10 layers in total) and remove them afterwards.
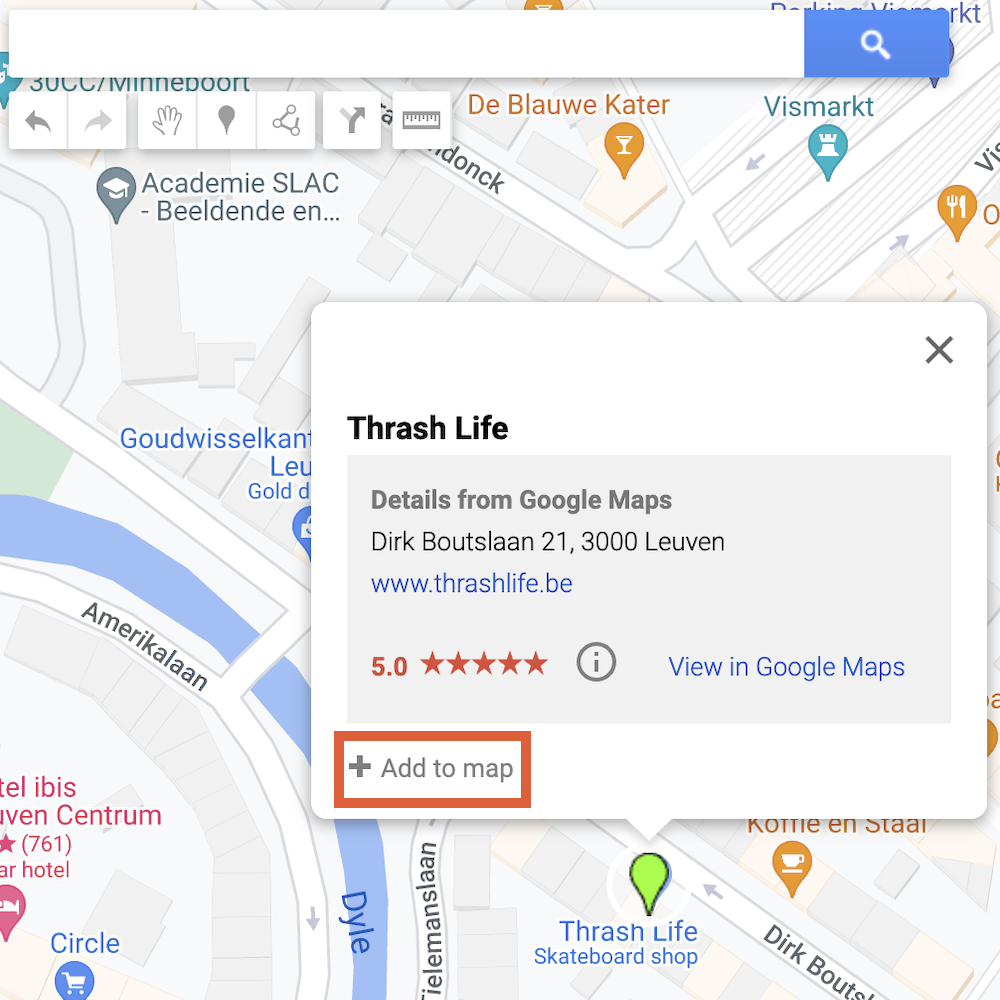
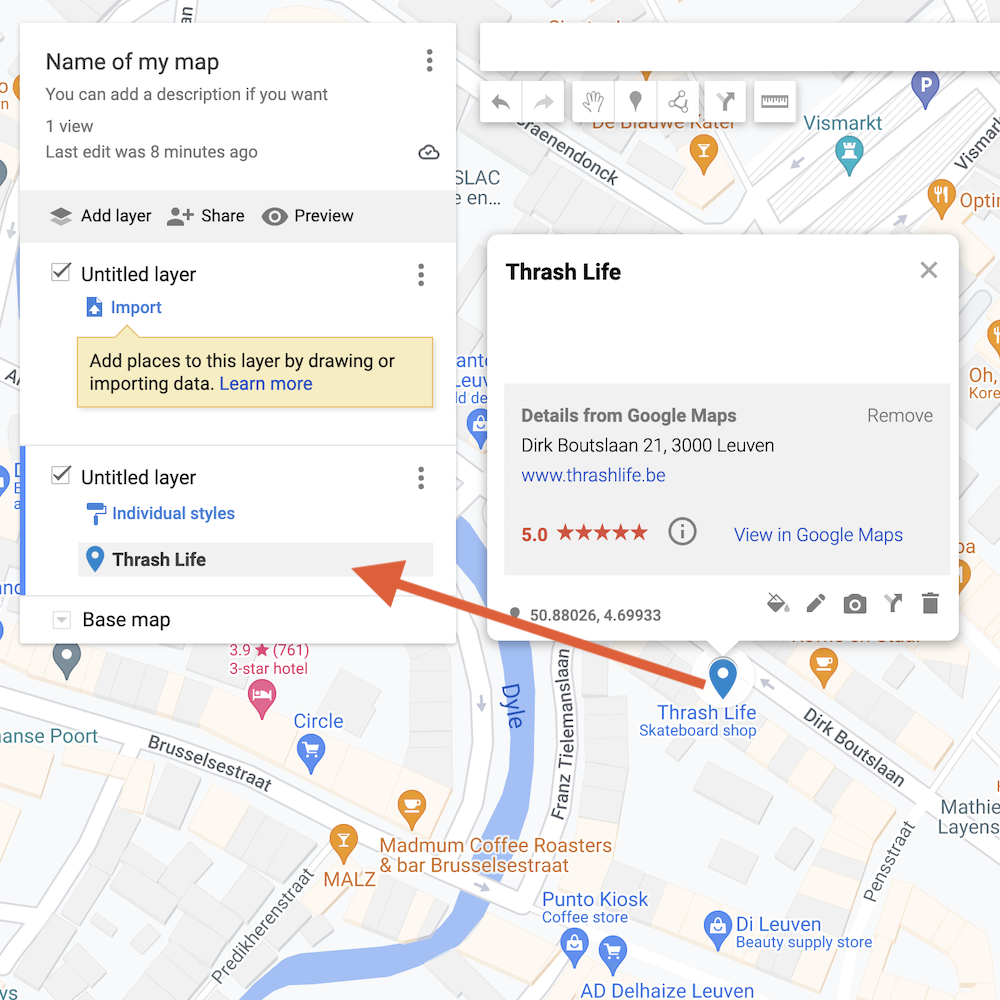
Step 4: Add places (and directions) to the map
You can add places to your layers. You can do this in different ways. I usually do it by entering the name of the place in the search bar. While you type the name, Google already shows suggestions. Which can save you some time. Another option is to use the icons below the search bar. There is also an icon here to add a direction, which I find super useful for road trips. If you click on this, Google automatically creates a layer for it. If you have already reached your maximum of 10 layers, you will not be able to add directions.Step 5: Customise markers / icons (optional)
Finally, you can also choose to give the markers on your map a different color and/or icon. You do this by hovering over the name of the marker until you see a paint can appear. If you click on this, you will see a range of colors and popular icons. If you click on "more icons", you will see many more options. I always use the older icons myself, but that is just because I'm used to it.And now you are ready to go on a city trip!
You can now use this map on your smartphone, both via the Google Maps app and in your browser. I always use it via the Google Maps app, because it also helps me navigate in a new city. In the app you can find them in the same place as the explanation above: link the app to your Google account, click on 'Saved' and then scroll down and click on Maps. And there you will find all your self-made maps. What I usually also do, after selecting the desired map, is click on my account and then on 'Offline maps' > 'Select your own map'. This way you can also consult the created map offline. More tips about using Google My Maps maps can be found here.Have fun!